Saturday, 27 August 2011

Expecting the Inevitable - Part B

Gas & Electricity

This is the second of a two-part article designed to educate the novice about the supply of services to properties and the location of the relevant meters and turn-offs.  Emergency situations are not that common but when they occur (for they surely will) knowing the location of your meters and relevant appliances will save much time and anguish.

To start with the basics, you need to know what a gas meter looks like.  Now I thought everyone knew what these were but I discover almost ever week that it’s so foolhardy to assume.  In Melbourne the most common variety is the blue/ grey model but newer similar ones also exist in a mushroom colour.  The gas meter is usually to be found externally on the ground and generally to the side or rear of the property.  Newer and perhaps more sensible options have both the water and gas meters side by side but this is rare.  In older properties gas meters can be found half up walls or located in the remains of the original outside laundry. These date from a time when gas was used solely for the new cooking ranges or gas fired washing coppers.


Typical meters on a house (top) and apartments (bottom).  In the vertical position the shut off valve is open and gas is flowing.  In an emergency, a quarter turn to the horizontal position shuts off the gas flow.
Heating
Gas related problems generally concern the hot water unit or the gas fired heating system such as a ducted (heated air) or hydronic (heated water) unit.  The older styled gas fired wall unit or ‘Vulcan’ style gas wall mounted heater are less problematic but even these should be cleaned and checked every year or so.

What type of heating do you have?  Pictured below are the common styled ducted (hot air) system and the more efficient hydronic (hot water) panels.  Ducted systems can also be placed in the ceiling where underfloor space is limited such as with a concrete slab.  The heating system for ceiling or floor-mounted ducts is essentially the same and almost invariably consists of a gas fired small furnace with electric fan to force the heated air through to the outlets.

Ceiling mounted ducted heating vents in an apartment.
Hydronic heating panel.
Ducted heating units are often confused with hot water heaters but the two are separate. Ducted heating furnaces are generally located by an exterior sidewall for underfloor heating and sometime within the ceiling cavity itself when ducts are ceiling mounted (discover where yours are).  In most cases, you will not have to concern yourself with their operation but should your ducted heating fail to heat when the fan is audible, the problem may simply be the pilot light.

The pilot light is a small constant flame that remains alight when the unit is not heating.  When the unit is turned on, the pilot flame ignites the gas and voila! heat.  A failed pilot light is common to both gas hot water units and ducted heating systems, some need to be lit manually whereas the modern ones rely on an automated system using batteries.  Sometimes the simple solution is to replace the batteries in the automatic pilot and the problem is fixed.
The ducted heating unit (left) and the gas hot water unit (right behind bushes).  Whilst not always placed together these units are often overgrown thereby hindering efficient operation.
More serious problems will require a specialist but most problems can be avoided with regular servicing.  I am constantly surprised that neglected and often weed encrusted units still manage to work year in and year out.  Discover what type you have and check it now, where is the pilot light and how do you light it?

Hydronic heating does not require the power assisted fan and is therefore silent.  It is a simpler system that utilises a (usually) gas-fired boiler that heats the water to the required temperature and then circulates this through to the individual unit or units in each room, providing radiant heat.  Individual controls at the panels themselves give greater options for cleaner (dust free), efficient and economic heating.  Problems with your hydronic system will require a specialist.

Electricity
Commonly confused are the electricity meter and the switchboard.  Whether you live in a house or apartment, the meter board or box will be located externally by a sidewall or perhaps the front entrance.  This is for the meter reader to gain access at any time.  The switchboard however is almost always found inside.  A typical location is just inside your front door and hallway but they can also be found in laundry cupboards.

A crowded meter board or box from an apartment block.  Note the dials on the right regulating the automated public lighting.
The supply of electricity to your residence is organised at the switchboard into two areas, Power and Light.  Depending on the number of your rooms and extent of your wiring, each of these areas will then have perhaps from 2-6 or more divisions called fuses.  Modern switchboards should be fitted with safety switches and in the event of a fuse group being overloaded (e.g. you plugged way too many outlets into the one power point) the board will automatically shut down and require resetting.

When a fuse blows or shuts off it is a safety measure.  A fuse is like a gateway that regulates flow... too much and it shuts down.  You then need to reset it or change the fuse wire (very old style) and think seriously about what you did to overload the system.

An original switchboard or fuse box from 1961 (top) and a single fuse with repair fuse wire (bottom).  Whilst this may seem antiquated, changing a fuse wire is still common in many homes.
A later switchboard combining original fuses with plug in circuit breakers.  Please note that circuit breakers are not safety switches.  Please consult a qualified electrician to ascertain which system you have and what is required to meet both legal and safety requirements.

Some History
Gas Street lighting first came to Melbourne in 1849 and was introduced by the Swanston Street Confectioner and entrepreneur, Mr. Overton. Overton’s gas illuminated lamp was made possible by a costly and elaborate individual coke fired plant and eventually led to the establishment of The City of Melbourne Gas &Coke Company (1850).  Essentially halted by the discovery of Gold, Gas lighting did not really get under way until 1856 in Melbourne.

We forget all too easily that prior to the introduction of natural gas in 1969, all gas was manufactured.  Gas was produced from coal at South Melbourne, Highett, Box Hill, Footscray and West Melbourne the latter being closed in 1970 after 113 years of continuous use.  The public, commonly referred to sites such as these, as gasometers and the product they produced was known as Town Gas as distinct from Natural Gas.

In 1881 the first electric light was displayed in Swanston Street by The Victorian Electric Light Co. and powered by a gas driven generator.  In 1888 The Melbourne City Council replaced two gas lamps with electric and by the end o the decade individual premises were being illuminated by small electricity generating plants.  It was a new, exciting but unregulated era with the Victorian Electric Light Co. becoming the Australian Electric Co. and later the Melbourne Electric Supply Co.

Electric Trams were introduced in 1906 and Electric trains (begun in 1912) by 1919.

Woman with electric appliances in Kitchen; toaster, oven, stove, fan and Kettle 1928.  From the photographic collection of the State Electricity Commission, courtesy of Museum Victoria.
“Don’t overload that Fuse!
This information is designed to aid you in safety it is not a guide for repairs.  Naturally when dealing with either Water, Gas or Electricity problems you need to use the relevant Trades and Authorities.  Being able to locate your services and meters quickly and understanding what systems you use, such as gas or electric hot water, ducted or Hydronic heating, etc. is vital for efficient and effective problem solving.

Friday, 27 May 2011

Expecting the Inevitable - Part A

Water

Amongst many things, the Scouting Movement is associated with the expression “Be prepared”.  A more classical interpretation might be “Forewarned is Forearmed” but both apply perfectly when it comes to property maintenance.  Having a building problem is not a case of If it happens but rather When, for it is inevitable.  To save time and unnecessary trouble a good start is to know the answers to these basic but rather crucial questions:
-  Where is the water meter located and how do I turn off the water.
-  Where is the gas meter and how does it shut off?
-  Where is my switch board and which switch shuts off the power? (try saying that three times).

These questions will sound simplistic to many but it’s surprising just how few owners and tenants know the answers.  Problems are not always going to arrive during business hours so be prepared in the event things go array at an awkward hour.  A common maintenance issue is the dripping tap and whether your tap is older styled or the more recent single flick-mix variety, turning the water off is the same.  If you live in a house, the water meter is generally located just inside the front boundary and usually to the left or right (often covered by vegetation).  Sometimes the meters have a loose cast iron cover which gives access to the metering dial and large tap handle.  Turning the tap fully clockwise shuts off the water to the premises and should halt any major leak until a repair can be affected.  Turning the meter fully off will stop all water both cold and hot.


Typical property water meters, one exposed and the other overgrown. Turning the tap fully closed will shut off the water flow to the premises but expect a minute or two for existing water to drain from the pipes.
For those in apartments or flats, individual turn off points vary.  Older blocks will typically have them (hopefully labelled) running along the lower sections of the side or rear outer walls.  Newer blocks will have them neatly displayed behind access panels in the buildings interior.  If you cannot find yours please ask, as it really is important to know.  I once received a phone call in the early hours of the morning from a frantic but apologetic tenant.  Their bathroom tap had dramatically broken off in the middle of the night and despite shutting off a meter, water was still pouring into the Bathroom and out onto the carpeted floor.  I applauded the tenants for their efforts, at least they tried but in their panic and unfamiliarity they had actually turned off their gas meter.

An older style block of flats with pipes leading to one of the upper apartments.  The tap on the left is the main water feed whilst the red handle stops the feed to the hot water unit.  Each block differs so get to know yours.  
If you live in a newer building or one with recent plumbing, you may not even have to venture outside.  Individual turn-off taps are such a sensible idea and will save you much aggravation when problems arise.  If these are fitted they can be shut off quickly and will halt water to the specific tap making it easy to replace a washer or indeed an entire tap without affecting the water flow elsewhere.

Hot and cold shut off valves beneath a Bathroom basin; turn clockwise to shut off.  If you have these, changing washers is a simple task.  Note that HOT taps are always on the left or at least should be.  In France the left hot tap can be confusingly labelled with a C but this actually stands for Chaud which is French for Hot.
An older styled toilet feed pipe.  Turning off the feed to the toilet cistern will halt noisy or running toilets until a repair can be affected.  Good to know if your toilet suddenly goes haywire.
Shut off valves act just like taps and are commonly used with flexible metal- sheathed hoses.  Don’t be scared of these, they are designed to be used, clockwise to turn off, anticlockwise to open.   If your problem only relates to the hot water in your premises you can always turn off the tap at the unit itself, this will stop all flow of the hot water but still allow cold water taps to operate.  This can be extremely useful if the repair is going to take some time or the hot water unit is readily accessible such as in a kitchen or laundry.  Most units however will be located outside or within the ceiling.


Scouting Badge
Please get to know where your meters and turn-offs are located and don’t wait for that crisis to catch you unaware.  Oh! can I also suggest you don’t leave the taps permanently turned on at your washing machine or at least turn them on and off occasionally to check they are operational.  I knew of a long-term tenant who disconnected the washing machine on moving day only to find the washers themselves had disintegrated within the tap.  The taps had been left permanently on for a couple of years and the plastic had long since dissolved without anyone knowing.  Yes, you guessed it, without a washer the tap couldn’t be turned off and the washing machine had to be reconnected until someone could find the turn off valve for the apartment (took quite some time).  I’d also recommend not leaving your washing machine in mid cycle when you go out.   Old hoses do burst and running water can give a frighteningly, literal meaning to the term floating floors.

 Lastly, use good metal washers, find that turn off valve and BE PREPARED.

Juliette Gordon Low, founder of American Girl Guides movement presenting an Order of Merit.  Anonymous circa 1918.
Domesticity in the Bush?  From Lord Baden-Powell's 'Scouting for Boys - Boys' Edition' 1953. 

Tuesday, 3 May 2011

Considering Timber Windows

High on my list of regular requests are problems with windows and after dealing with quite a number this week I felt a small piece outlining their problems and solutions may be in order; I’ll also throw in a little history.  Whilst the focus is on timber, the points made here can be readily applied to both steel and aluminium and covers all styles.

Overwhelmingly, window problems are preventable and due in the majority of cases to one thing - poor maintenance.  I cannot stress this enough to owners and tenants alike and I will repeat here what I regularly say to all with window problems.  The key to sound and functioning windows is down to two words of one syllable each, if you have windows ‘USE THEM’.

Too simple you say?  

Trust me I know what I’m talking about because I see the same problems almost every week and am called in to fix what was easily preventable.  How many of you open your widows on a regular basis?  Do you have a room where the windows are never used?  Certainly you do, we all do and that is the problem.  A window sash is simply any timber or metal framed moving glass panel.  Whether the window is a traditional vertical lifting sash, a side hinged casement or a top hinged awning variety,   excessive moisture retention leads to serious  consequences.  I’ll save my attitudes to our growing obsession with air conditioning for another time but consider this, if the inside temperature is vastly different to the outside, then timber (particularly) is prone to distortion.

Moisture invariably gets trapped between the sill (the very base of the window) and the bottom of the sash and quietly rots away whilst the unwary occupant basks in sub tropical heat.  Add to this scenario the successive layers of paint applied to the interior more than the exterior and you begin to understand the dilemma.  One recent owner was perplexed about his rotting Bathroom window, “...after all John, we never, ever open it so why is there a problem?”

Traditional Weighted Sash windows

The moving, timber framed, glazed sash immerged in the early seventeenth century and is generally attributed to the French.  It was the English however who perfected the counter balance mechanism that allows the vertical sliding sash to be self-supporting when moved and this weight-balanced system dates from around 1680.  The rope sash window typically seen in Victorian and Edwardian houses is essentially unchanged from the seventeenth century design and almost 350 years of regular use must surely say something about reliability.

Replacing the broken or worn sash ropes is one of my most rewarding maintenance jobs as it gives the resident a functioning window and in all probability a repair that lasts for decades.  If you have broken or frayed ropes it is relatively simple to have them replaced but please do so before you paint the windows as access to concealed weights does require removal of some of the timber trims (not as frightening as you imagine).

I was once directed by an estate agent to cut off the broken cords of a  sash window and nail it shut.  Incredulous at his barbarism you can imagine my answer.

As indicated, a window regularly used will avoid rot but if it exists and continues unchecked a wooden sash or sill will become severely damaged.  This process of damage is not quick and is the result of years of neglect and indifference.  When a sash itself is weakened by rot, the joinery naturally loosens, making the glass precarious.  The simplest solution is to replace the whole sash frame itself with a salvaged one of the same size.  If a replacement cannot be readily found another option is to partially remake the frame, replacing damaged timbers (usually the base) with new sound timbers.  Once painted the replacement lengths are virtually undetectable.  The downside here is time, for the offending sash must be left with the joiner (usually a week) leaving the occupant with a missing windowpane. 

So to avoid all this you need to go right now and open those windows you’ve been neglecting.  What’s that?  You can’t open them? Nailed shut? Rotting? Broken cords?

Relax, it’s ok you can give me a call.  Just don’t ask me to nail them shut.


Sad yet extremely common examples of neglect.  Obviously these window frames and sashes are beyond repair and will need to be replaced.  An easily avoided expense.

A severely damaged sill from a 1902 Edwardian house,  caught at this point irrepairable damage can still be avoided.

Another window from the same premises.  Note earlier attempts to replace rot in the sash frame with epoxy filler.  A full sash replacement is the only solution for this problem.

Detail of a well maintained Victorian window showing the rope and traditional pulley mechanism.

A variation on the rope system is the less efficient spiral/sprung lifting sash which appeared in large numbers following the Second World War.  The spiral sash mechanism does not require weights and holds the window in tension via conduit covered twisted springs.  Ironically the spiral sash is more time consuming to repair as replacement sized spiral springs often need to be ordered.

Monday, 2 May 2011

Working with Paint

It would be interesting to know just how many litres of paint I have used over the years.  Although not a trade painter I’ve undertaken many interior and exterior makeovers and regularly work with both water and oil based paints.  The last few days have found me adding to this experience in the lofty heights of a Melbourne CBD apartment block applying swaths of designer whites.

In addition to complete repaints I am regularly asked to freshen uptired or grimy finishes for impending rentals or sales or to “just paint over the offending marks.”  I hear this so often that I feel some written advice may be helpful for those who find these requests perfectly sound and simple.

The tidy up of marked walls is never routine for the original paint is rarely available and even then can be a different product inside the tin from that on the walls or woodwork.  Exposed to general wear and tear and extremes of temperature, paint changes.  For this reason even a diligently kept tin of the original paint (a rare occurrence) can sometimes give disappointing results when applied over itself.

To be successful the ‘quick’ paint-over must be done to the whole wall and not merely part of it.  Yes, I realize that may be obvious to many but I sometimes struggle to get the logic of the idea across.  Even if the re-touch colours match, it is far better for the surface to have a complete uniform coating rather than one with isolated patches that show up in the ever-changing light.

Sometimes the only option for a decorator intent on the original colour is to request a paint match and I use this term in the general sense for really no two colours are ever the same.  In spite of advances in modern technology a colour- matching computer can only do so much and the required colour will need to be fine tuned by the paint shop staff.  Achieving the right colour and sheen level is really an exacting skill so please be patient with your paint person, give them the respect their efforts deserve and please don’t be in a hurry.

For these reasons your choice of supplier is crucial.  I generally steer away from individual recommendations but I will suggest you choose a store that deals solely in paint.  Yes, I have had successful results from my local hardware stores but really if you are matching paint get assistance from those who specialize.  A question I am often asked is which paint brand I prefer.  Obviously I prefer quality to quantity but really I have had good results from all of the known brands and even those under the radar.  Generally though there is a reason behind the higher price and good ingredients are worth it.  The point with painting is preparation and taking care with colour, finish and application.  It sounds obvious but there is no point buying the most expensive paint if you use cheap rollers and brushes and rush the job.

Obtaining the correct colour is one thing; the next stage is the finish or sheen level such as matt, low sheen, satin, semi-gloss, etc.  Sheen level is crucial to successful matching but this is often overlooked in the desire for colour perfection.  A freshly painted low sheen finish will generally be shinier that that of an existing, earlier example of the same brand.  Consider this point, as sheen level drops with age and cleaning.  With exterior paint for instance, a full gloss finish will diminish rapidly with the weather and can appear dull after a matter of months.  If you were intent on matching the finish in this situation, then the sheen level would be dropped to perhaps a semi-gloss to avoid the obvious higher shine ‘retouched’ look.

You need a good sample when colour matching.  At a pinch a small coin-sized sliver may be enough but really you need something much larger.  The computer lens requires only a tiny sample area but you need the extra size for the potential matches.  Possible matches are painted directly onto your original paint samples and dried (often by a hairdryer) to gauge the match.  Often three or four attempts are needed to get the desired result, hence the need for large or multiple samples.  Why the drying?  When wet, paint reflects more light giving the impression of a lighter colour.  Paint therefore dries darker and needs to be dry for the colour to be assessed.

Getting samples of the required colour is usually a problem.  I have seen feeble attempts to scrap paint flakes from walls and woodwork with pathetic results.  Good samples require you to be a little daring and adventurous.  If the colour were on wood, say, a skirting or architrave then I would consider removing a small length and reattaching it later.  Trust me it’s common to see painters in shops with a length of timber under their arm, as sometimes it’s the only way.  Walls made of plasterboard are easier to sample as a rectangle of colour can be carefully cut from either inside a cupboard or behind a door or fridge etc.  You simply need to cut through the paper covering the inner plaster and peel this off.  The exposed white plaster can be filled and then sanded when dry.  If you are repainting then any small areas damaged by sampling should be invisible after decorating.

Then again you could simply choose an entire new colour scheme, oh... and speaking of designer whites.

An advertisement taken from the August 1966 edition of ‘The Practical Householder’ magazine (UK). 


Friday, 18 March 2011

Essentially concerning Locks

Welcome...

My name is John and this is the first of hopefully many posts dealing with building maintenance and history.

This week has been fairly typical with the usual requests for repairs, installations and problem solving.  Less common has been the significant number of requests for new locks or general assistance with locking problems and doors.  For this reason I think it apt for this first blog to focus on security fixtures. The same locking issues are common to both large homes and small flats. Regardless of price or apparent complexity all locks do one thing, they place a solid bolt or bar into a fixed housing preventing the door or window from being moved. Simple right?

No matter how strong or complex the lock may be it is only as strong as the material it is mounted to. To put it another way, even the best lock will be inherently weak when screwed into soft wood and this essentially means your security is down to the holding ability of a few screws. 

In most cases, doors and door jams (the timber surrounding the door opening) are made from hard woods but soft woods were and are still used on many doors and surrounding architraves such as the attractive, grainy, red-pine commonly used on Californian Bungalow style houses and flats from the 1920s and 1930s.

Red Pine door circa 1923
Should your entrance door contain glass or be of semi core construction then the security factor is understandably reduced. My point here is not to alarm but to bring a little common sense to the problem. Think about what you want from your lock and where it is to be fitted. As with most things, I suggest quality and not quantity is the answer. A common occurrence with new tenants or property owners is to fit additional new locks. I understand the reasoning but consider this, each time a lock is fitted more significant holes are placed in a perhaps already compromised door. One apartment I visited this week had four locks attached to the entrance door, some lacked keys others had simply never worked properly. Unfortunately the solution at each stage was to fit an additional one.

Entrance door severely weakened by additional lock

I am not a locksmith or security advisor but if you want to replace a lock, I recommend you do so in the existing original position. Holes generally conform to two sizes and you can readily find a quality replacement to match the original, measure the hole or take a photo or (preferably) the lock itself to your supplier. An even simpler solution is to keep the body of the original lock but replace its barrel (the cylinder where the key slides in). Replacing entire locks or simply the barrel also gives you the opportunity to match the keys. Really, who wants to carry around more keys? Think about having front and rear doors keyed alike. In many cases you can even have the same key fit your window locks.  Only one key?  Yes, it is possible, so please think before running out to buy that shiny new lock.

A selection of replacement lock cylinders

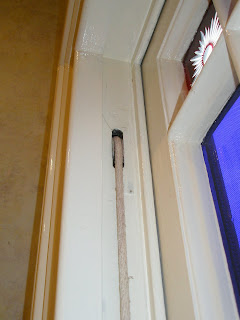
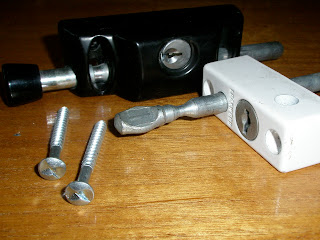
On the topic of window locks you may not be surprised to know that the same apartment had not one but three locking bolts on the one sash window. The reason is only too common and extremely infuriating... missing keys. In this instance the keys went missing whilst the window was unlocked and the solution on both occasions had been to fit a replacement. They could not remove the pointless locks as all had been installed with one-direction security screws meaning they can’t be unscrewed.
Please think very carefully about window locks and locking bolts there are many varieties and makes on the market and I have had to remove quite a number of them when keys are misplaced.  In the worse case scenario this means grinding them off and a particularly noisy and dusty business it is, not to mention the unavoidable damage to the surrounding timber and paintwork.

Familiar brand name window and door locks
Note the one-way security screws
Keyed window locks or bolts only prevent an intruder from opening the window once they are inside thereby hampering their efforts to remove goods. Their usage is widespread and growing possibly due to some insurance companies requiring them for household content coverage. Certainly make sure your windows can be fastened but if you do fit additional locking bolts to windows and sliding doors make a note of the key and/or barrel serial numbers so you can always obtain a replacement.

Lastly some words about getting the details right.

Please consider the styling and appearance of your locks. This may sound trite but I have seen many well designed and built dwellings marred by faulty and thoughtless fittings. This is doubly inexcusable when dealing with heritage or significant architecture. Please match the lock to the surrounds, do use the original mounting positions. If you are fitting a new entrance door in an apartment block make sure it and the lock and handle heights conform to those surrounding it and make note of the finish, is it brass, bronze, chrome or steel?